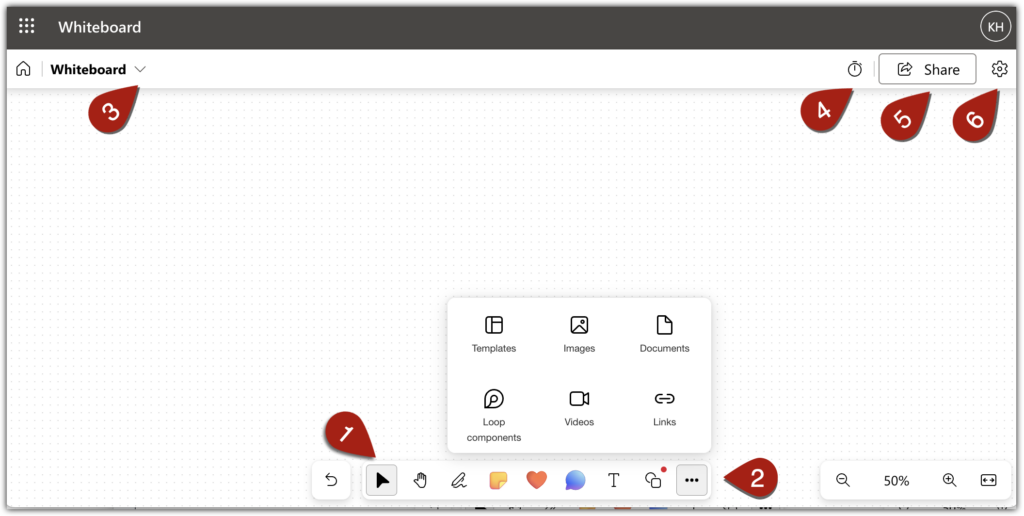
The Microsoft Whiteboard interface is designed to easily allow users to add a variety of content types to the board.

On the bottom of the whiteboard is a toolbar where users decide how they want to contribute to the board (e.g. sticky note, reactions, shapes, etc.) [1]. Selecting the “more options” icons opens a menu with additional content types you can add to the board, including templates, images, and links [2].
Selecting the name in the top left corner of the board allows you to rename the board [3]. In the top right corner, there is a timer [4], the share interface where you can add student collaborators [5], and the settings menu, where you can export the whiteboard, see who made what contributions to the board (“authors”), format the board background and more [5].
Creating a Microsoft Whiteboard
Login to your BC Microsoft 365 account
Go to whiteboard.office.com
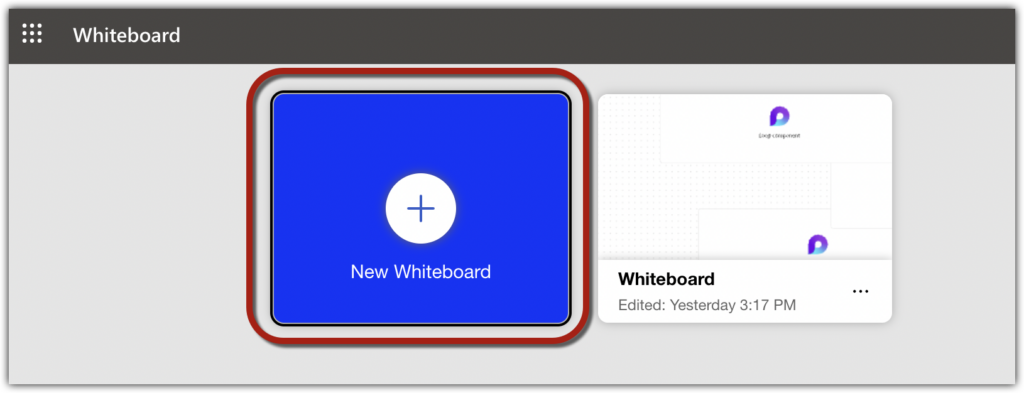
Select “new whiteboard”

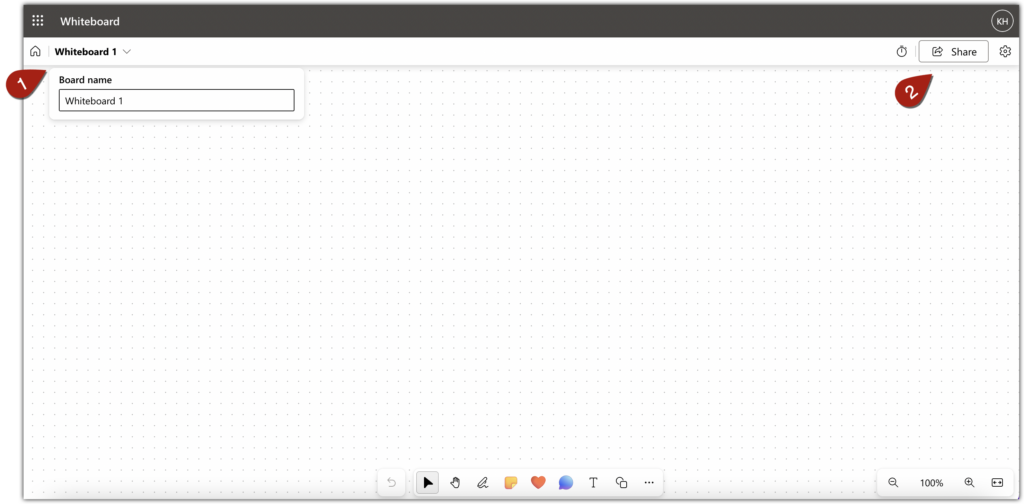
Add a title to the Whiteboard using the field in the upper left corner of the screen [1] and share it with students using the “Share” icon in the upper right corner of the screen [2].

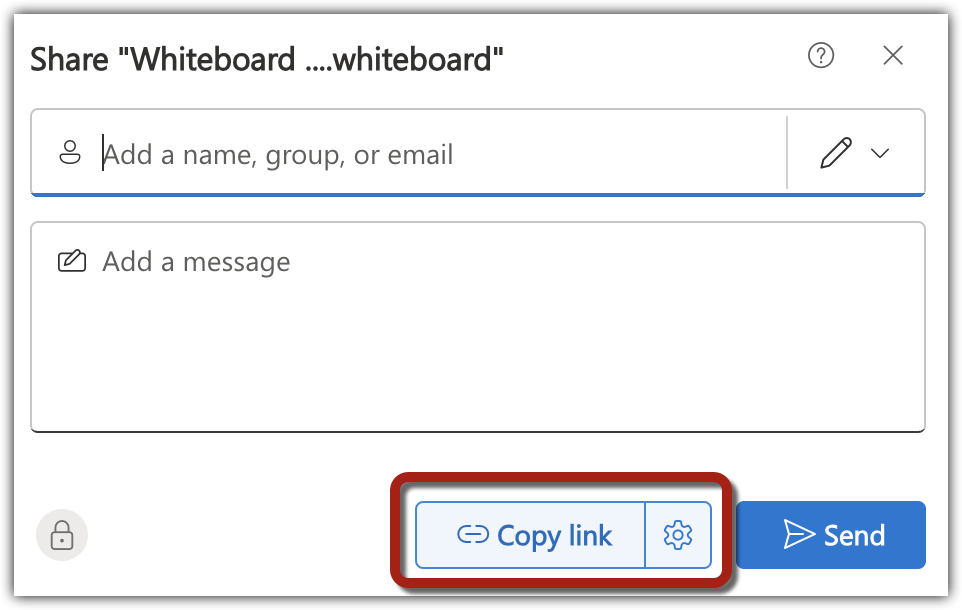
From the share interface you can add the names of students who will use or view the board and copy the whiteboard link. You can then add the link to Canvas or any other location where students can easily access it.
