You can use Zoom Whiteboards in Zoom Meetings or as a collaboration tool outside of meetings. The default blank Zoom Whiteboard is very similar to the blank Jamboard.
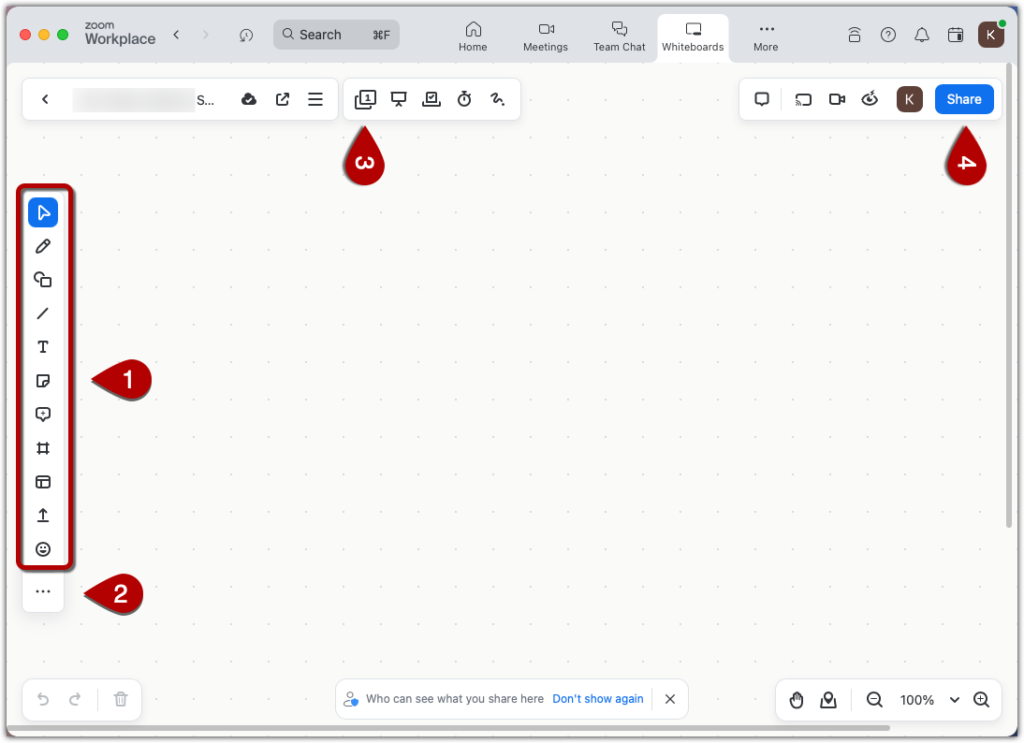
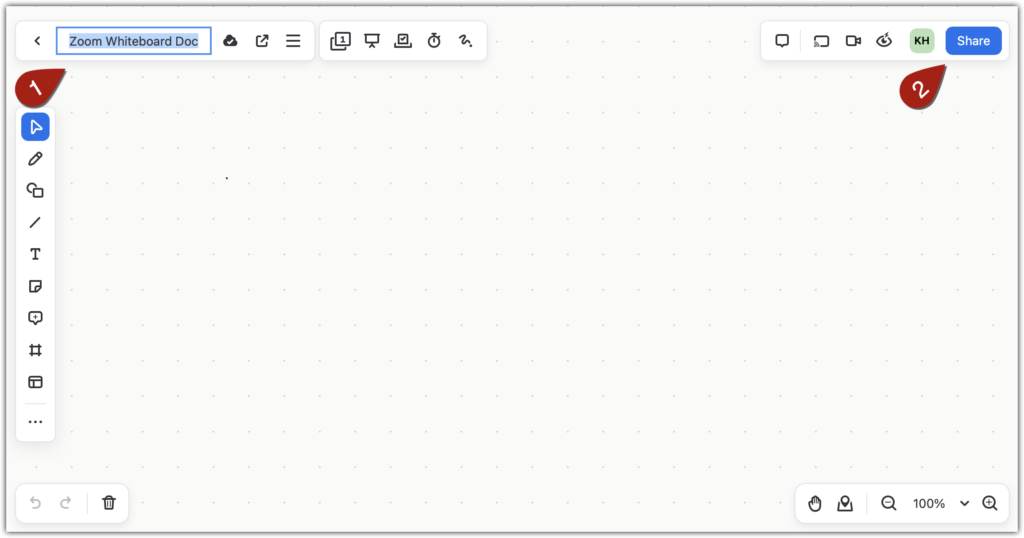
The default toolbar is on the left hand side of the screen and includes the Jamboard options of posting sticky notes, drawing shapes, writing text, drawing or writing with a “pen” and more [1]. Emojis and GIFs — and additional content types — can be added by clicking on the “More options” icon on the bottom of the left hand menu bar [2].
You may add additional pages to the whiteboard via the page button on the upper menu bar [3]. And you can share your whiteboard and set access restrictions to it by clicking on the blue “Share” button in the upper right hand corner [4].
Creating a Zoom Whiteboard
The method you will use to create a Zoom Whiteboard will vary depending on how you are using Zoom (e.g. the desktop client or the web portal).
These are instructions for creating a Zoom Whiteboard in the desktop client. See the additional resources below for information on creating a whiteboard from other Zoom interfaces.
Open the Zoom desktop client.
Log in to your BC Zoom account.
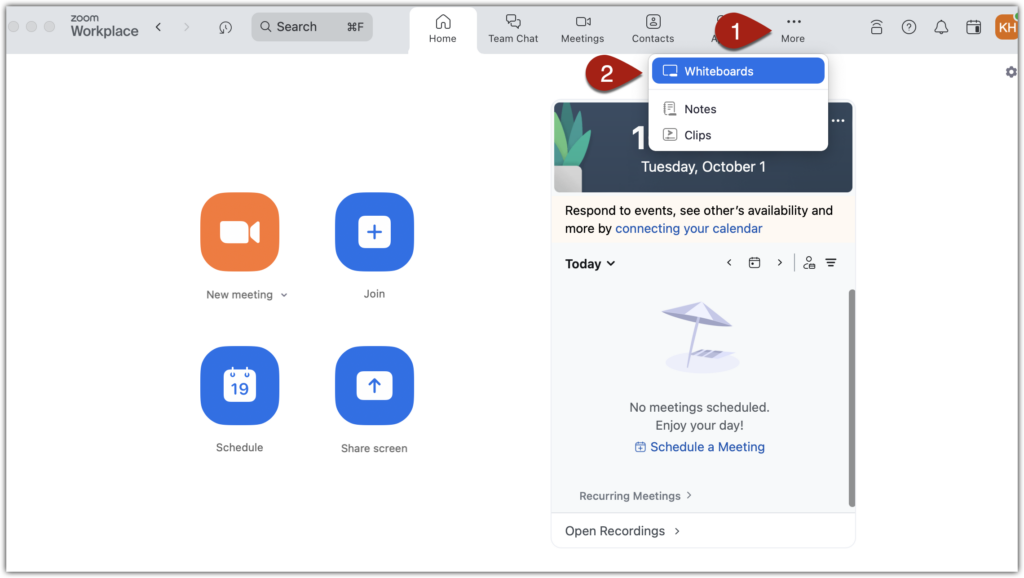
Select the “More” tab [1] and choose “Whiteboards” [2].
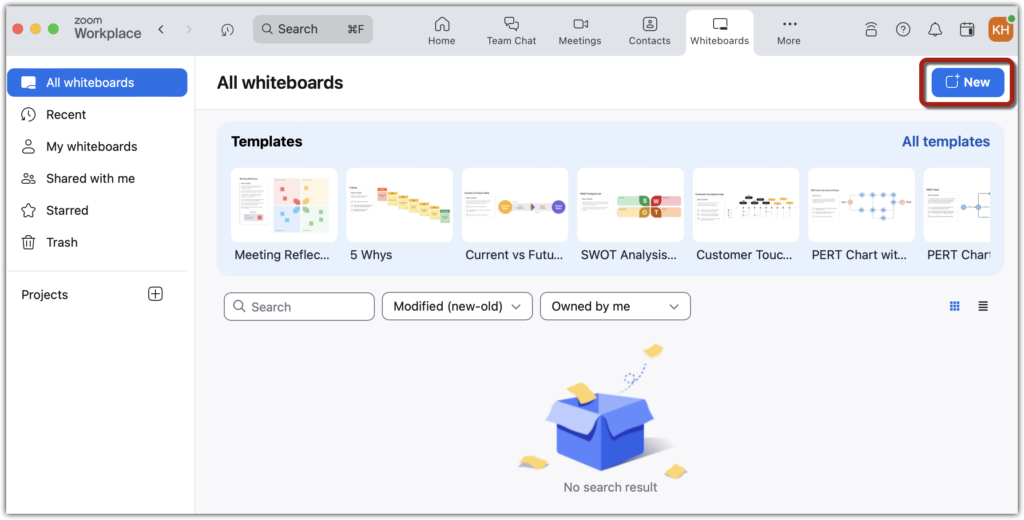
Select “New” from the upper right corner of the Whiteboard area.
Add a title to the Whiteboard using the field in the upper left corner of the screen [1] and share it with students using the “Share” icon in the upper right corner of the screen [2].
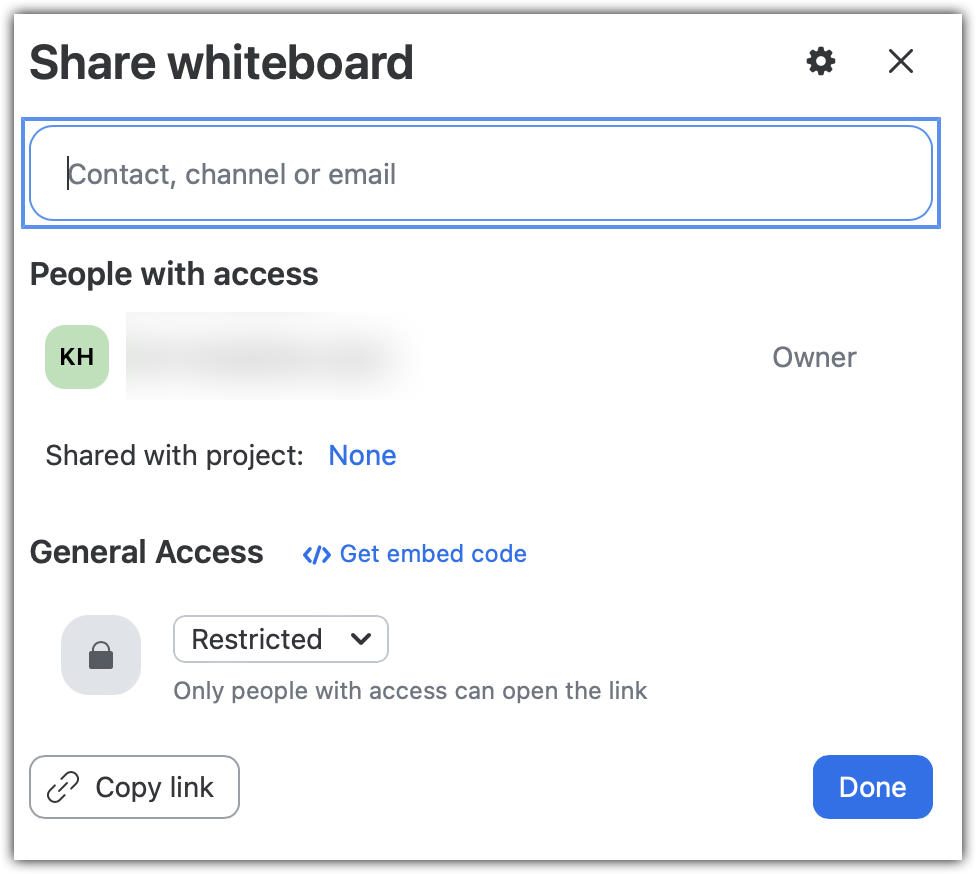
From the share interface you can add the names of students who will use or view the board and copy the whiteboard link. You can then add the link to Canvas or any other location where students can easily access it.
