Managing Group Settings
By default, Perusall puts students in groups of 20. Depending on the nature of your course and the guidelines you set for student annotations (quantity, length, and level of detail), a smaller group size might allow for more focused collaboration between students.
You can adjust the group settings for your site by going to the “Settings” tab and clicking “Grouping.” Ideally, you should adjust these at the beginning of the semester, before too many students enter your Perusall site from Canvas. (Adjusting group settings mid-course will affect student views of previous documents.)

By default, Perusall sorts students into different groups for each assignment. If you want students to be in the same groups for the entire semester, you can set up groups manually. Groups can also be imported from Canvas. Read more about how groups work in Perusall, and see below for steps to manage groups.)
Specifying Groups
While Perusall sorts students into different groups for each assignment by default, it is possible to manually assign students to a single group for the entire semester by changing the “Grouping” settings in your Perusall site.
Begin by clicking “Settings” in the menu on the left hand side of the Perusall homepage and then selecting “Grouping” in the settings menu, as shown above.
Once in the “Grouping” tab, locate the Grouping Method setting and click on “Specify groups.”
Once you have selected “Specify groups,” a list of student names will appear, with a list of group names beneath it. To the left of each student’s name is a number which corresponds to a group on the list below. You may manually assign students to specific groups by clicking on the number to the left of the student’s name [1] and changing it to the group number you want to assign them to. When you have finished making changes, click on the “Save Changes” button [2].
Importing Groups from Canvas
Perusall’s Canvas integration also provides the option to create groups on Canvas and import them to Perusall.
As described above under Specify Groups, enter “Settings” in the menu on the left, then select Grouping.
Once in the “Grouping” settings, locate the Grouping Method setting and click “Specify groups” [1]. Then, click “Import groups from Canvas” [2].
A new browser window will open, listing the different Canvas group sets available to you. Clicking on the group set of your choice will automatically import that list to Perusall, close the new window, and return you to the “Grouping” settings window.
The “Grouping” settings page will now display the names of your students, along with a “Group names” list beneath it. To the left of each student’s name is a number which corresponds to a group on the list below; these will be organized according to the Canvas group set you imported. However, you may still manually assign students to specific groups if you choose, by clicking on the number next to the student’s name [1] and changing it to the number of the group you want them to be in. When you have finished making any changes, click on the “Save Changes” button [2].
Troubleshooting Groups
Perusall sets up student groups as soon as each document is uploaded, which can occasionally result in some errors with group assignments. (For example, for a large lecture course with 80 students, Perusall might put 20 students in one group and 60 in another.)
Fortunately, this is easy to fix:
Double-check your group settings (in “Settings” -> “Grouping”) to make sure they’re accurate before proceeding.
On the Perusall course home page, click the “Documents” link in the top navigation.
On the Documents page, click the name of the Document you want to check.
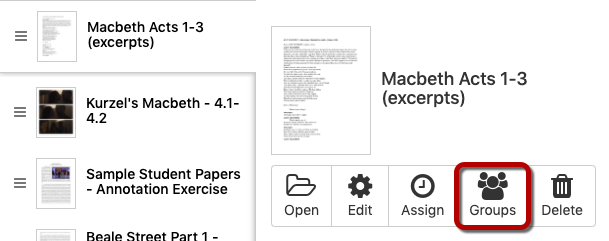
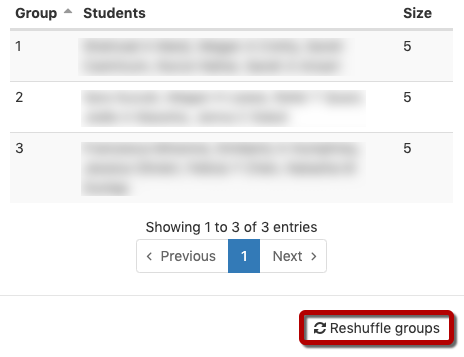
Click the “Groups” button on the right. This will pop up a list of the groups assigned to this document.

Click “Reshuffle groups” and click “OK” in the pop-up message explaining how this will affect preexisting student comments in the document.

Perusall’s documentation provides more detailed information about group settings.