In addition to broader steps that can support academic integrity in courses, there are a number of features in New Quizzes that can support academic integrity, including: setting an availability window, shuffling questions and/or answers, displaying one question at a time, requiring access codes, and setting a time limit.
If you’re interested in using a proctoring service in New Quizzes, see our resource on LockDown Browser & Respondus Monitor.
How to Set Availability Window
1. In addition to setting the “Due Date” [1] (which basically accounts for late submissions), instructors can use the “Available from” [2] and “Until” [2] options in both Classic and New Quizzes to limit the period within which students can access and complete a quiz. Make sure to add customized availability windows to account for student accommodations by using the “+ Assign To” [3] icon. 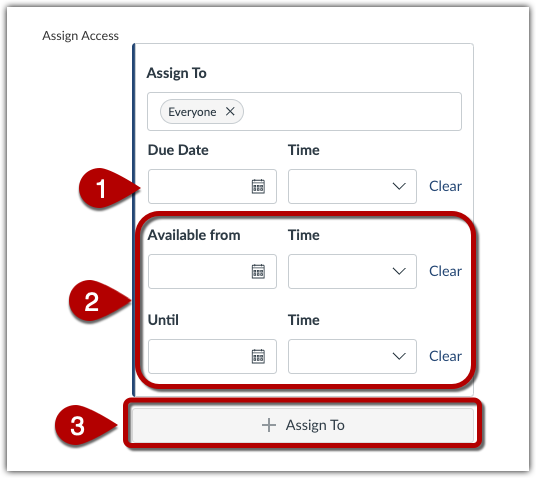
Note: Students can see the due date on the Calendar and in their To Do list.
Shuffle Questions
1. To shuffle the order questions are displayed to students, access the “Settings” tab in the Quiz Builder and click the “Shuffle Questions” button. If this setting is turned off, questions will display in the order you designate in the quiz.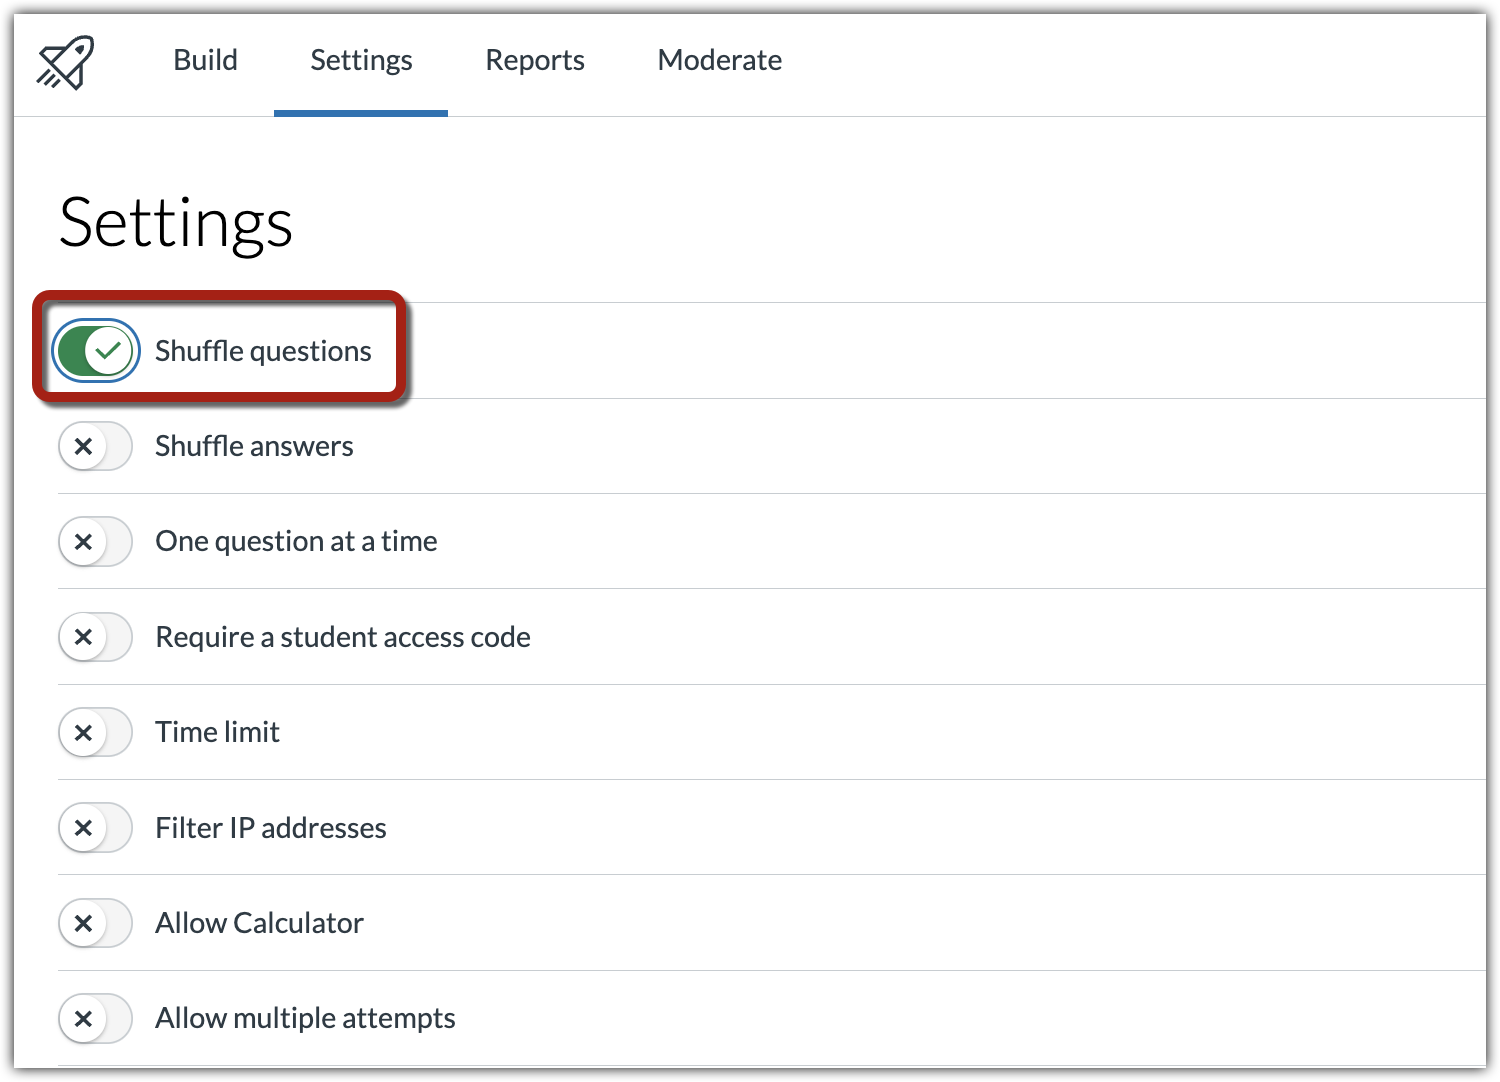
Note: Item bank questions that have been added in a group will continue to be randomized within that group whether this setting is turned on or off.
Shuffle Answers
1. To shuffle the order in which answers are displayed to students for multiple choice, multiple answer, and matching quiz questions, go to “Settings” tab in the Quiz Builder and click the “Shuffle Answers” button. If this setting is turned off, answers will display in the order you designate in the quiz questions.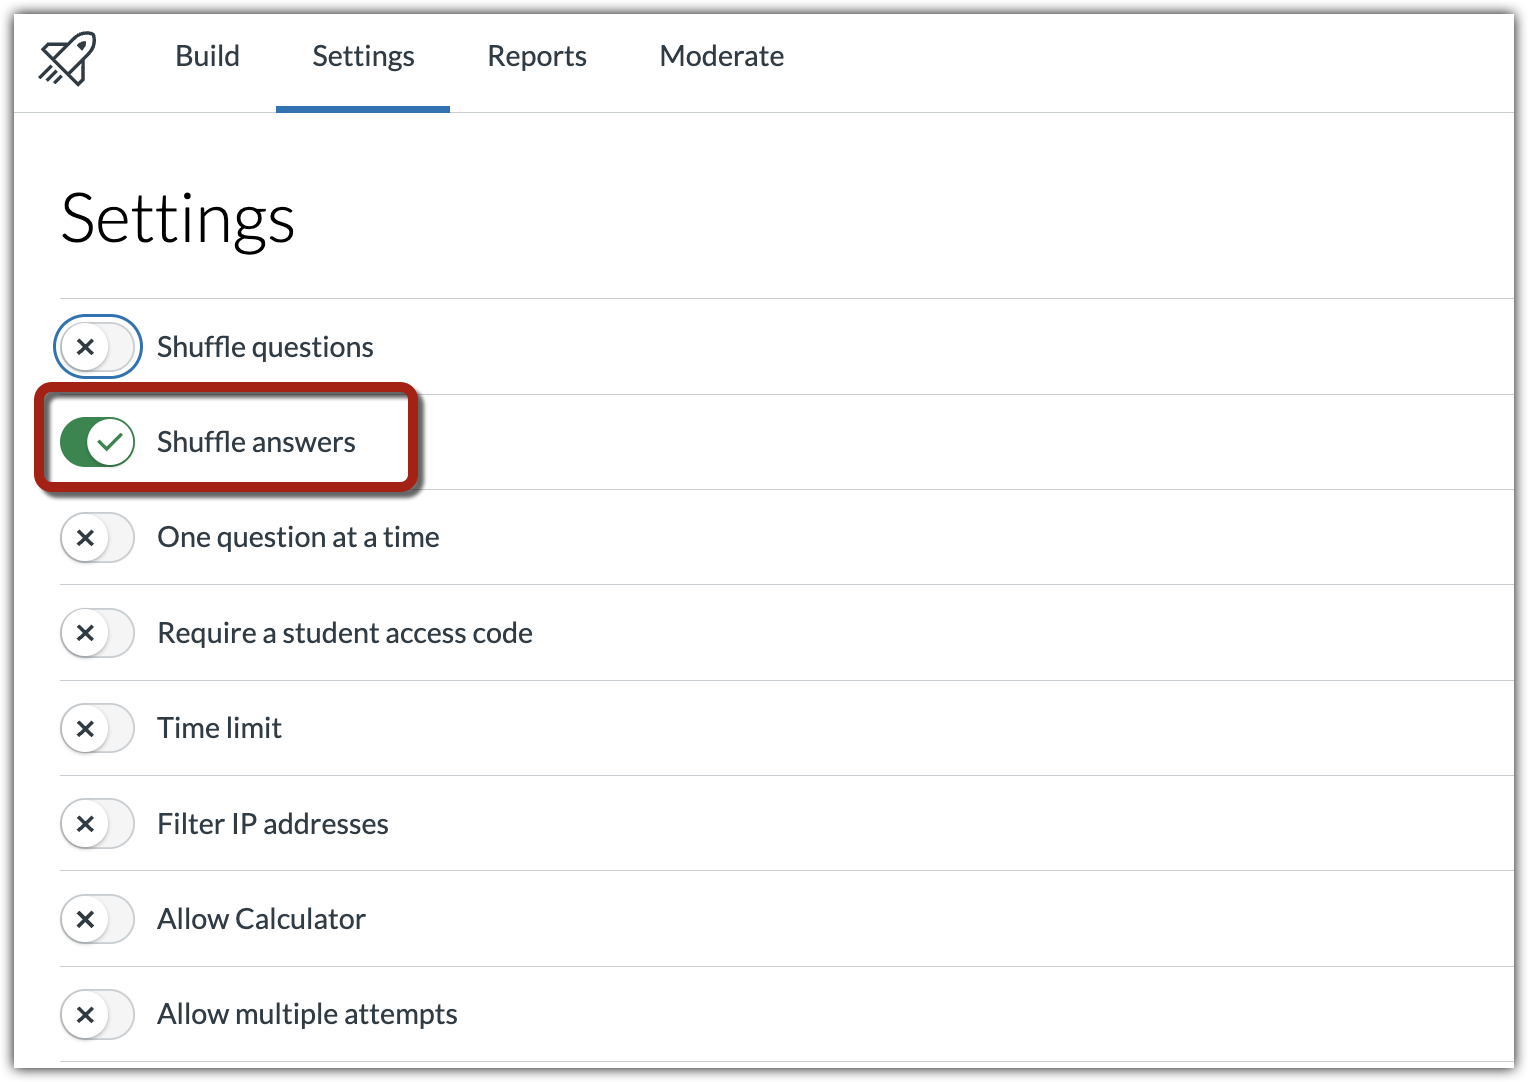
Note: Shuffling answers does not guarantee the order is displayed differently to every student. Some students will receive the same answer order, depending on the number of answers for each question.
Display One Question at a Time
1. To display one question at a time to students, go to “Settings” tab in the Quiz Builder and click the “One Question at A Time” button [1]. By default, the Allow Backtracking setting is selected [2]. 

Require a Student Access Code
1. If you want to make sure only students who are physically present can take the exam, you can require a student access code. To do so, go to the “Settings” tab in the Quiz Builder and click the “Require a student access code” button [1]. Then enter the access code in the Password field [2]. To view a masked access code, click the Show access code checkbox [3]. 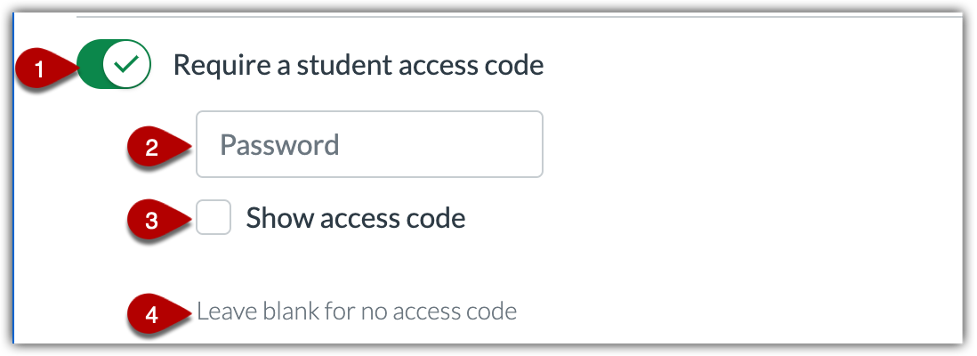
Note: You can Leave the password field blank if you do not have or require an access code [4].
Set Time Limits
1. To set a time limit for a quiz, go to “Settings” and click the “Time Limit” button [1]. Then enter the time limit using the Hours and Minutes fields [2].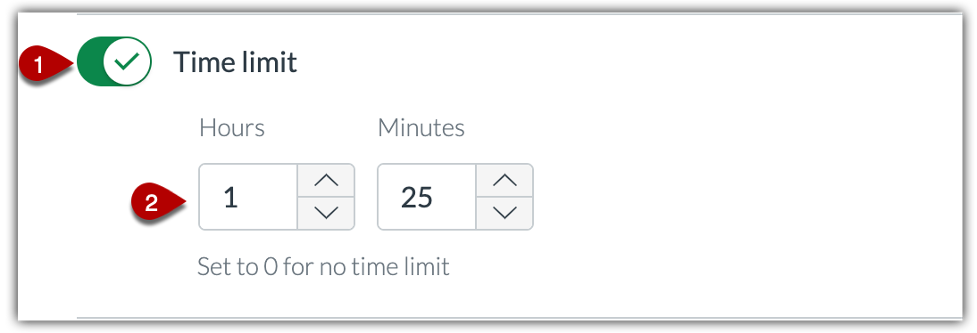
Note: In progress quizzes automatically submit when the Availability date and time passes, even if there is time remaining. See the page on Accessibility & Accommodations for information about how to set extra-time accommodations.