The Rich Content Editor (RCE) is the interface that allows you to add text, multimedia, links and more when creating various pages on Canvas (including Assignment instructions, the Syllabus page, Discussion Boards, etc.) In January 2021, Canvas updated to a new version of the RCE. This resource provides an orientation to the RCE’s layout and the location of commonly used features. It also identifies some steps you can take within the RCE to make your Canvas course accessible to all your students.
You can access tools in the Rich Content Editor through the icon toolbar or the text menus.
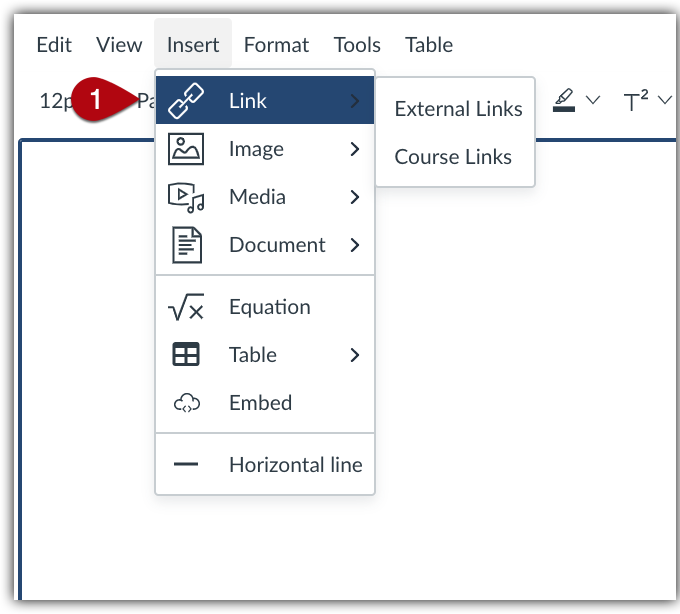
Creating External and Course Links
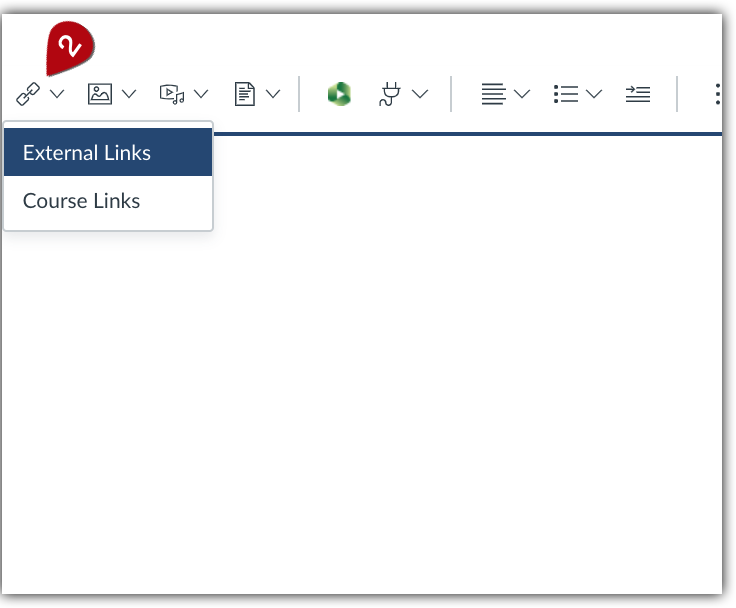
- You can insert a link into the page by navigating to “Insert” dropdown menu and selecting “Link” [1] or by selecting the chain icon on the toolbar [2]. You will be prompted to insert “External Links” or “Course Links.”
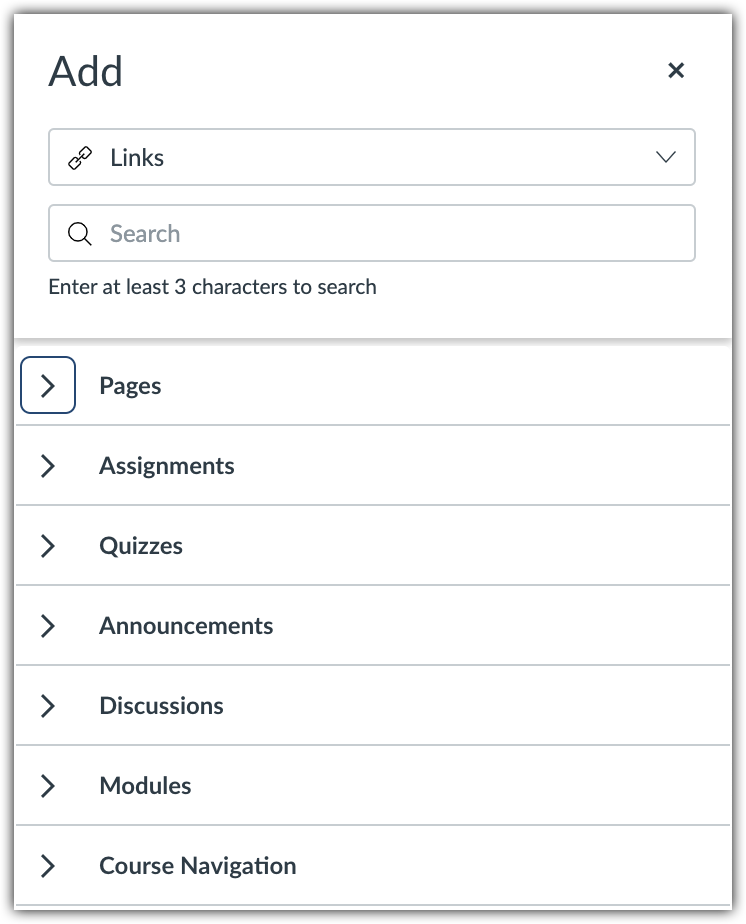
- Selecting “Course Links,” brings up the insert menu and allows you to select the location in your Canvas course (the page, assignment, or module, etc.) that you would like to link to.
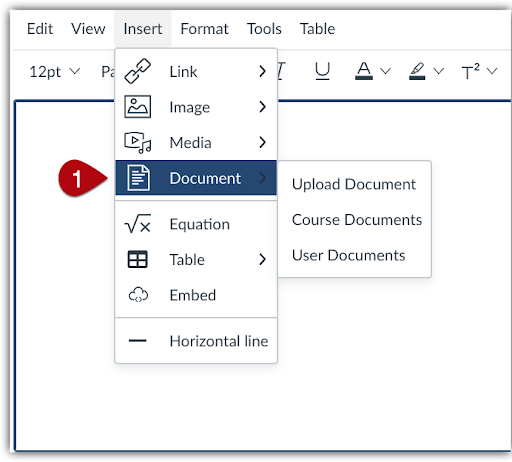
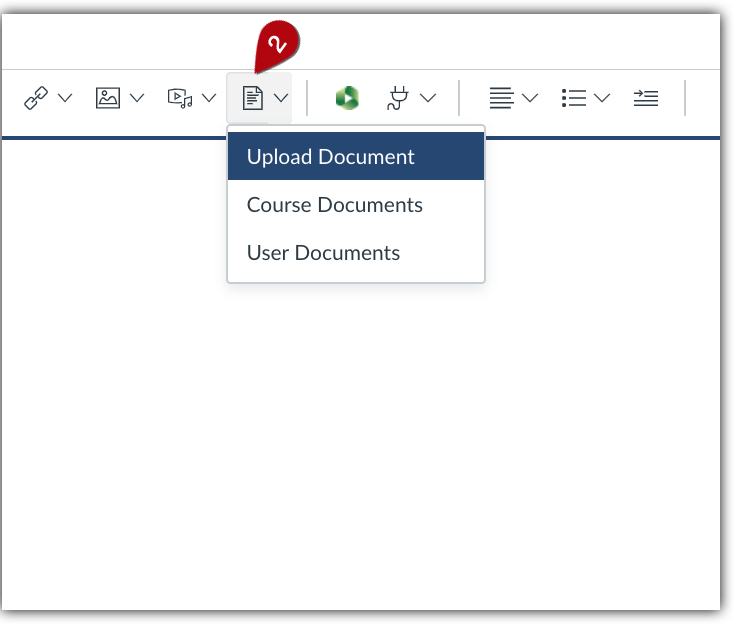
Creating Document Links
If you need to create a link to a document, you can do so by navigating to the “Insert” dropdown menu [1] and selecting “Document” or by navigating to the document icon [2]. From either of those locations, you can select:
- “Upload Document” if the document is not yet saved in Canvas (Note: When uploading files directly in the Rich Content Editor, you cannot select the folder where you would like the file to upload. If you want to organize your files, you must first go to the Files area of Canvas to upload the document to the correct place.)
- “Course Documents” to choose a file that has already been uploaded to the course Files
- “User Documents” to choose a file that you have uploaded to your personal Files area in Canvas
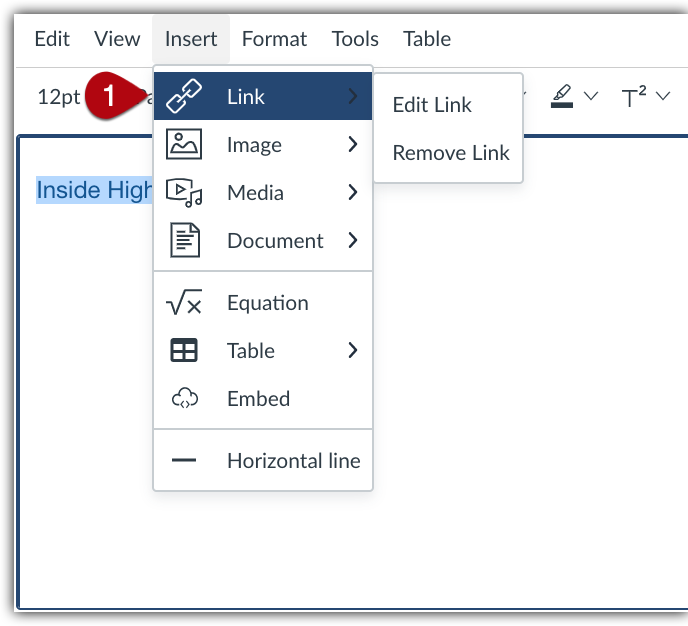
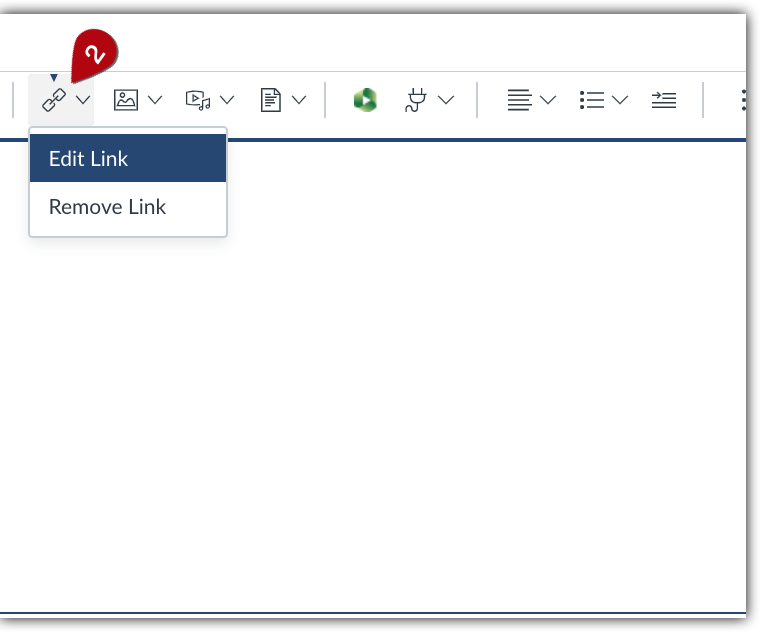
Editing Links
To edit a link, click on the link to highlight it and then navigate to the Insert menu and select “Link” [1] or navigate to the chain “link” icon [2]. From there you can select “Edit Link” or “Remove Link.” If you want to edit a course link you will have to select “Remove Link” and then add the correct link.
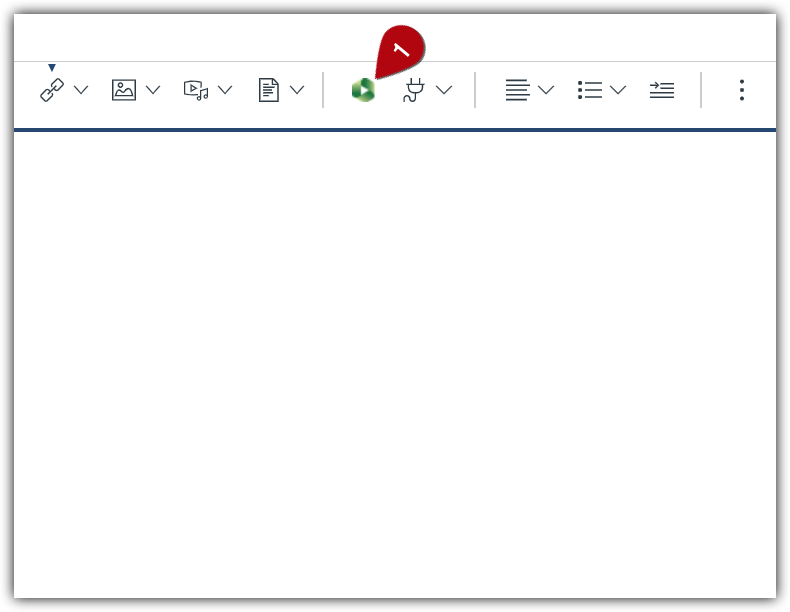
Accessing Panopto and Other Tools
You can embed Panopto videos into the Rich Content Editor by clicking directly on the Panopto icon in the toolbar [1].
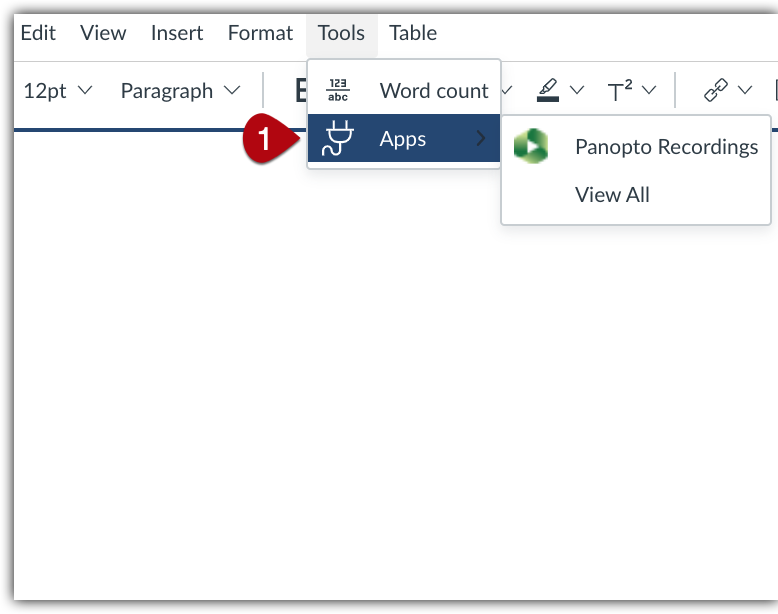
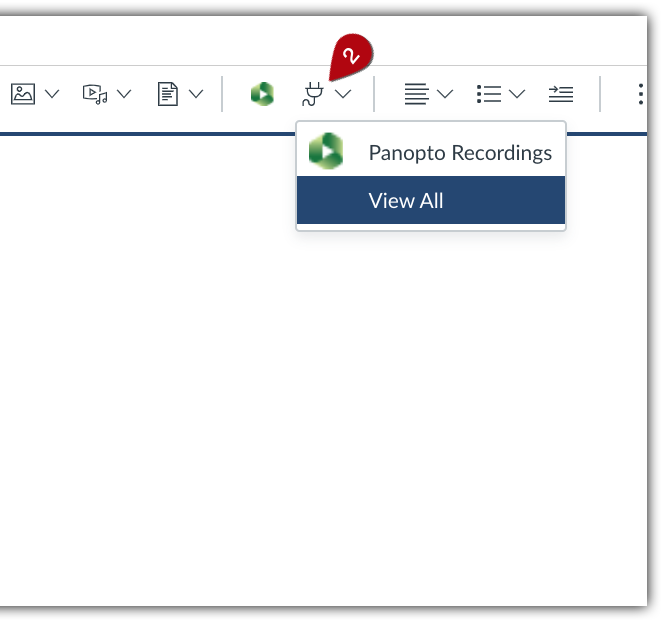
You can access all the available third-party tools (Panopto, YouTube, Twitter, Google Charts, etc.) by navigating to the “Tools” dropdown menu and the “Apps” option [1] or by selecting the “plug-in” icon on the toolbar [2].
Please note:
- If you select the dual-sided arrow in the bottom right-hand corner of the screen, you’ll end up in fullscreen mode. Select “esc” (escape) on your keyboard to return to standard view.
- If you run into any trouble accessing the Rich Content Editor, you can begin troubleshooting by verifying that you are using a supported browser.
Further information on the Rich Content Editor can be found in the Rich Content Editor Chapter on the Instructure website.
Creating Accessible Content
When using the Rich Content Editor, there are a few steps you can take to create more accessible content. While these steps may be necessary to provide particular students with the accommodations they need — with support from the Disability Services or Connors Family Learning Center for those students and instructors — they can also make it easier for all students to access learning materials.
- Headings: Using the headings under the format menu of the content editor allows those who are engaging with a content through a screen reader to recognize hierarchical organization of content and quickly browse through section headers.
- Descriptive links: Creating hyperlinks that briefly describe the linked material makes it easier for those who use screen readers to scan links. You can find more information on writing descriptive link text from Michigan Tech University.
- Alt text for images: Those who use screen readers also benefit from alternative text, or “alt text” associated with pictures. Alt text provides a brief description of the image that makes it possible for all students to engage with visual content. You can find more information about including alt text in the Rich Content Editor from Canvas and guidance on writing alt text from Penn State.
- Video captioning: Captions can make audio and video content more accessible to students who have hearing impairments and students who speak English as a second language, and having a choice between listening to audio or reading captions can be convenient for anyone. Read about how to caption videos created in Canvas.