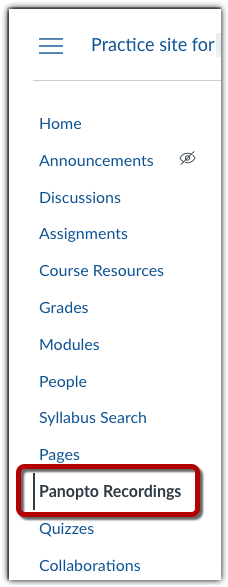
From within your Canvas course, click on the “Panopto Recordings” link from the course menu on the lefthand side.
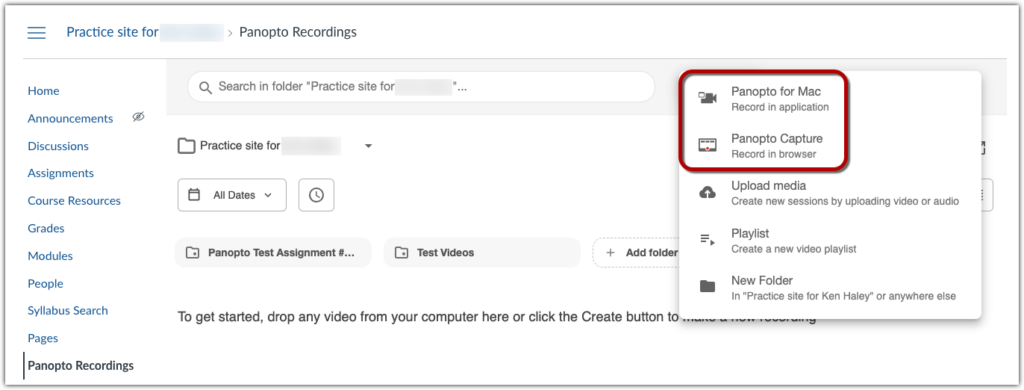
The Panopto interface will appear. Click on the “Create” button and then select “Panopto for Mac/PC,” if you want to create the recording through the Panopto App, or “Panopto Capture,” if you want to create the recording through your browser.

Installation
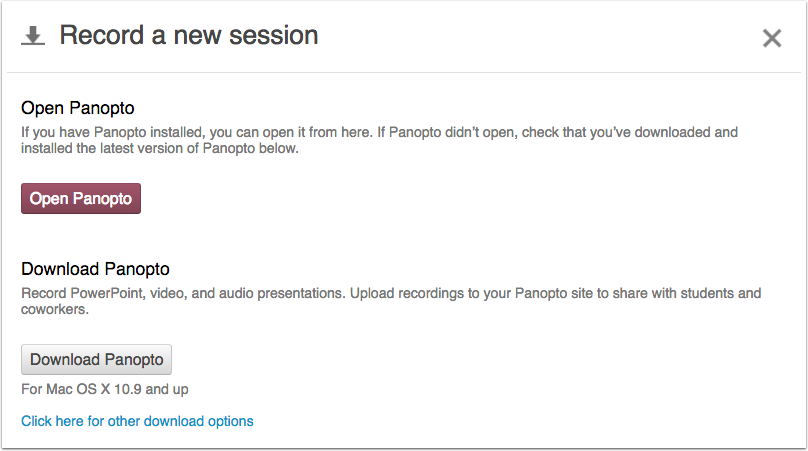
If this is the first time you have accessed Panopto, you will now be prompted to download the Panopto recorder on your computer. If you’ve already installed the recorder, click “Open Panopto.”
Installation for Windows and Mac
The recorder will begin to download. Once the software has been installed, you will see the Panopto Personal Capture recorder.
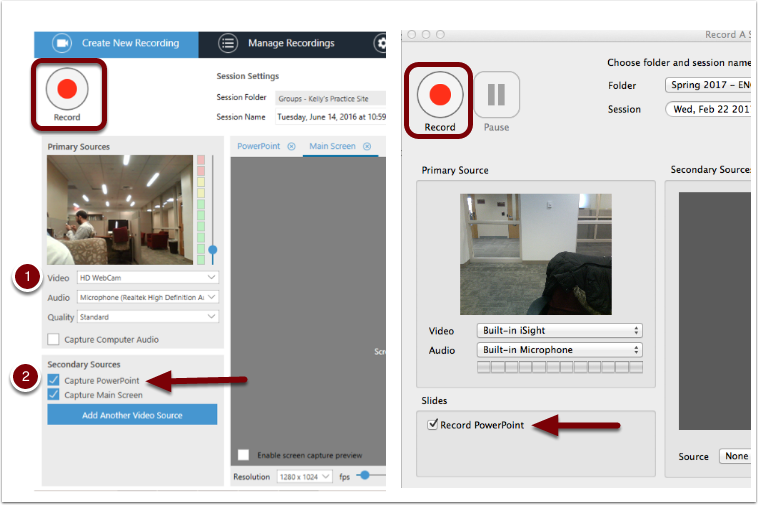
The drop-down menu displays the session folder where the recording will be saved. You may change the session title in the field next to “Session Name” (Win) or “Session” (Mac).
[Please note: Panopto may select your personal folder, “My Folder,” as the default session folder. Use the drop down menu to select the session folder that corresponds to the appropriate Canvas course.]

Next to video, webcam may or may not be selected according to preference [1]. If you are using Powerpoint, check the “Powerpoint” check box so that the recording that is produced will include a table of contents from your PowerPoint headings. If you want Panopto to capture your whole desktop screen, select “capture main screen” [2]. To begin recording a session, click “Record.”
When finished recording, the system will automatically publish the recording to your Canvas course site. After the video is processed (can take up to a few hours), you (and your students) will be able to access it from the “Panopto Recordings” link in Canvas.
[Note: Personal captures will publish to your Canvas course immediately unless availability settings are changed. For instructions on making recordings unavailable at the session or folder level until approved, please see instructions below.]
Edit a Recording Before Publishing
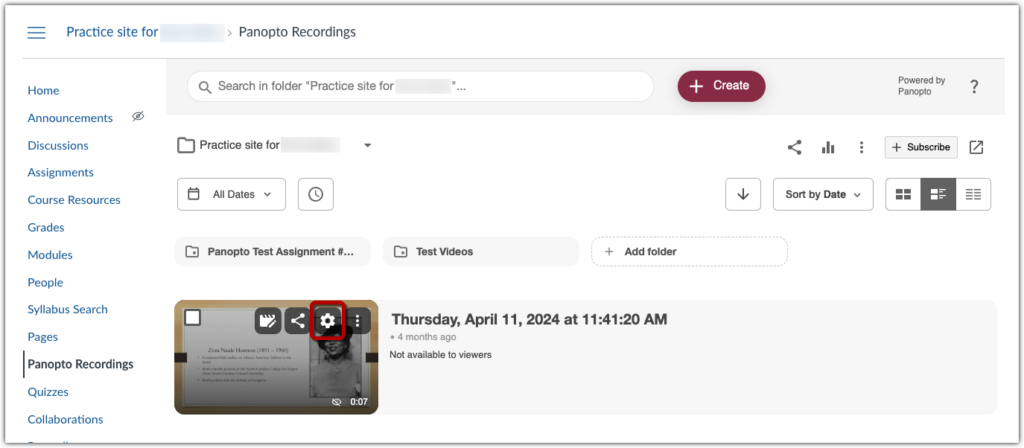
If you are not ready to publish the session, return to your “Panopto Recordings” folder in Canvas to view sessions.
Roll over the title of the session to reveal a menu and select “Settings.”
Under the “Availability” heading select “Starting” and choose a date in the future (one that gives you enough time to complete the editing), then close the window.

[Note: There is no “save” button in this window; make changes as needed and simply close the window.]
Publish Recordings Later
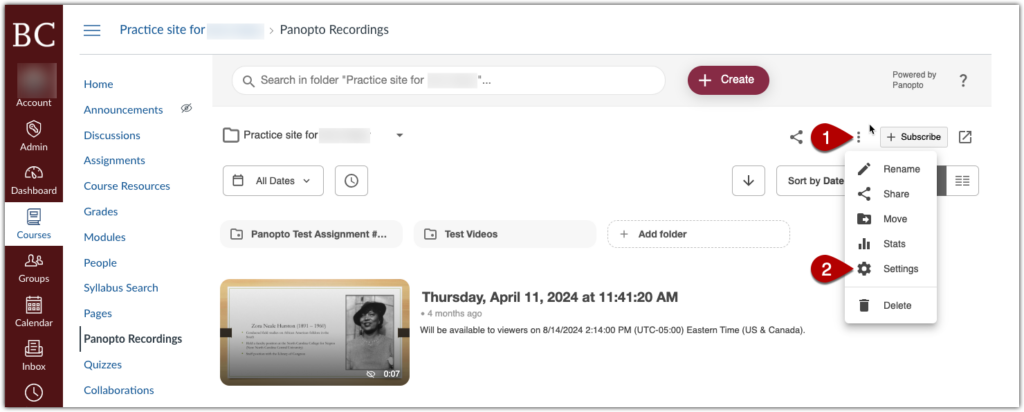
Select the “More Actions” icon on the right side of the screen (1). In the drop down that appears, click on “Settings” to access “Folder Settings” (2).
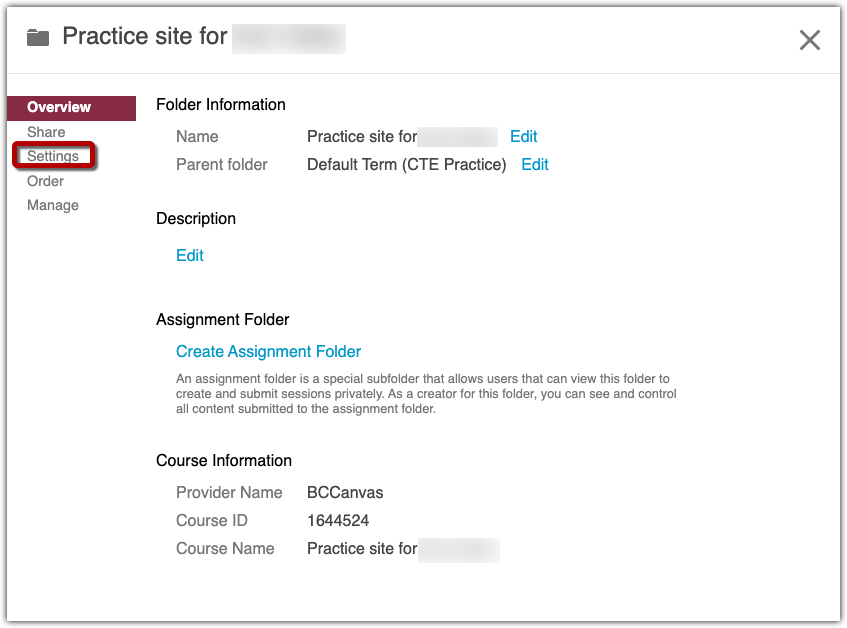
Select “Settings” from the menu on the left side of the new window. [Note: You will first be guided to an “Overview” of the folder.]
In the “Availability” section, select the option “never” to prevent all sessions in this folder from being published to viewers before approval.
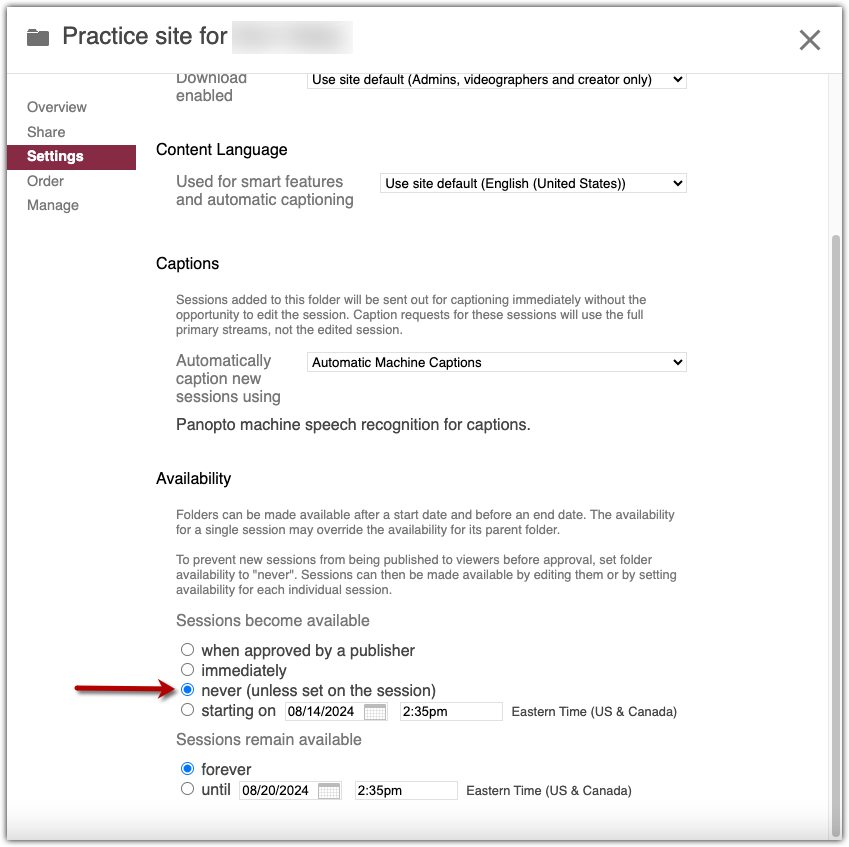
Sessions in the folder can then be made available to viewers on an individual basis by editing availability for each session.
When course folder availability is set to “never,” individual sessions in the folder will appear with the message “not available to viewers.”
Publish Individual Sessions
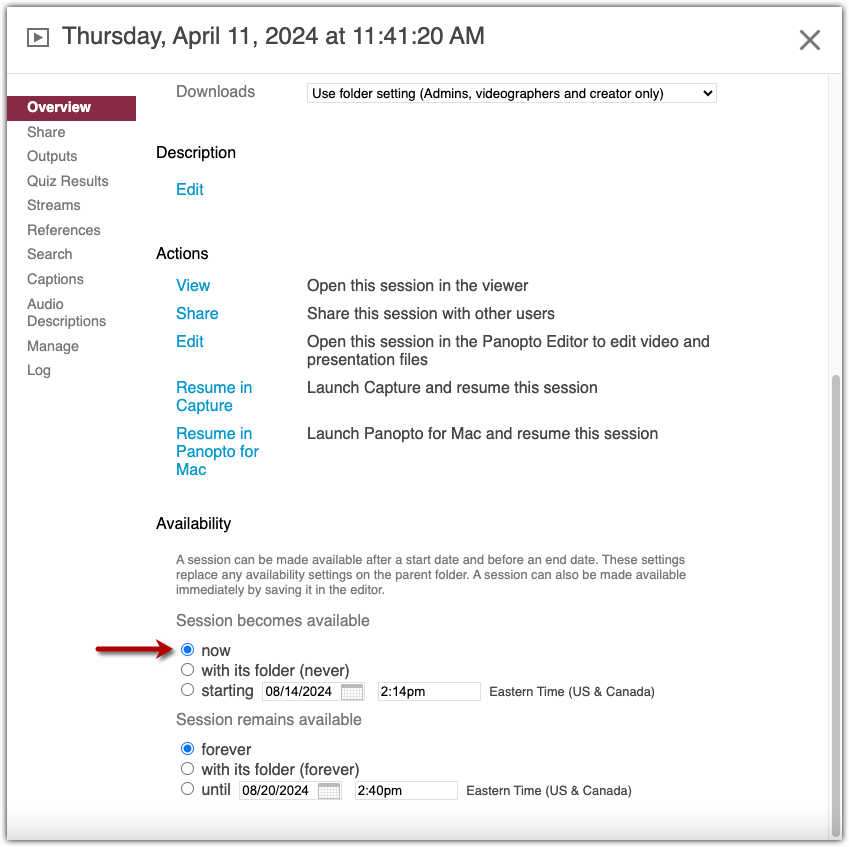
To publish individual sessions, roll over the session title to make session menu appear and then click “Settings.”

In the “Availability” section under “Session becomes available,” select “now” to publish the recording to your Canvas site.