• Resources Home
  • Technologies
  • Strategies
  • Course Design
  • Resources Home
  • Technologies
  • Strategies
  • Course Design

Lecture Capture

home/Resources/Lecture Capture
Expand All Collapse All
  • Introduction to Panopto
    • Create a Panopto Recording and Publish to Canvas
    • Preserve Recordings by Copying Them to your Personal Folder
      • Find and Share Recordings from Your Personal Folder
    • Restore Archived Videos
    • Publish Panopto Recordings by Default
    • Make a Hidden Panopto Recording Visible to Students
    • Enable Automatic Captions in Panopto
    • Upload a Video on Your Computer to Panopto
  • Share Panopto Recordings
    • Embed a Panopto Video in Canvas
    • Add Panopto Recordings to Canvas Modules
    • Copy or Move a Panopto Recording to Another Course
    • Share a Panopto Recording to Viewers Outside Course
    • Copy Recordings from a Personal Folder to a Course Folder
  • Advanced Panopto Features
    • Download a Panopto Recording
    • Hide Panopto Recordings from Students by Default
    • Create a Panopto Playlist
    • Panopto Analytics
  • Panopto Video Assignments
    • Instructor Guide for Panopto Video Assignments
    • Student Guide to Panopto Video Assignments
  • Edit a Panopto Recording
    • Add a Quiz to a Panopto Recording
    • Add a YouTube Video to a Panopto Recording
    • Add Web Content to a Panopto Recording
    • Build a Panopto Recording From Scratch

Edit a Panopto Recording

Updated on October 18, 2024

This page provides step-by-step instructions on how to edit save, and publish a Panopto video.

Access the video editor from from the “Panopto Recordings” tab in your Canvas course site. Roll over the title of the session you want to edit to make the menu appear. From the menu, select “Edit,” and the editor will open.

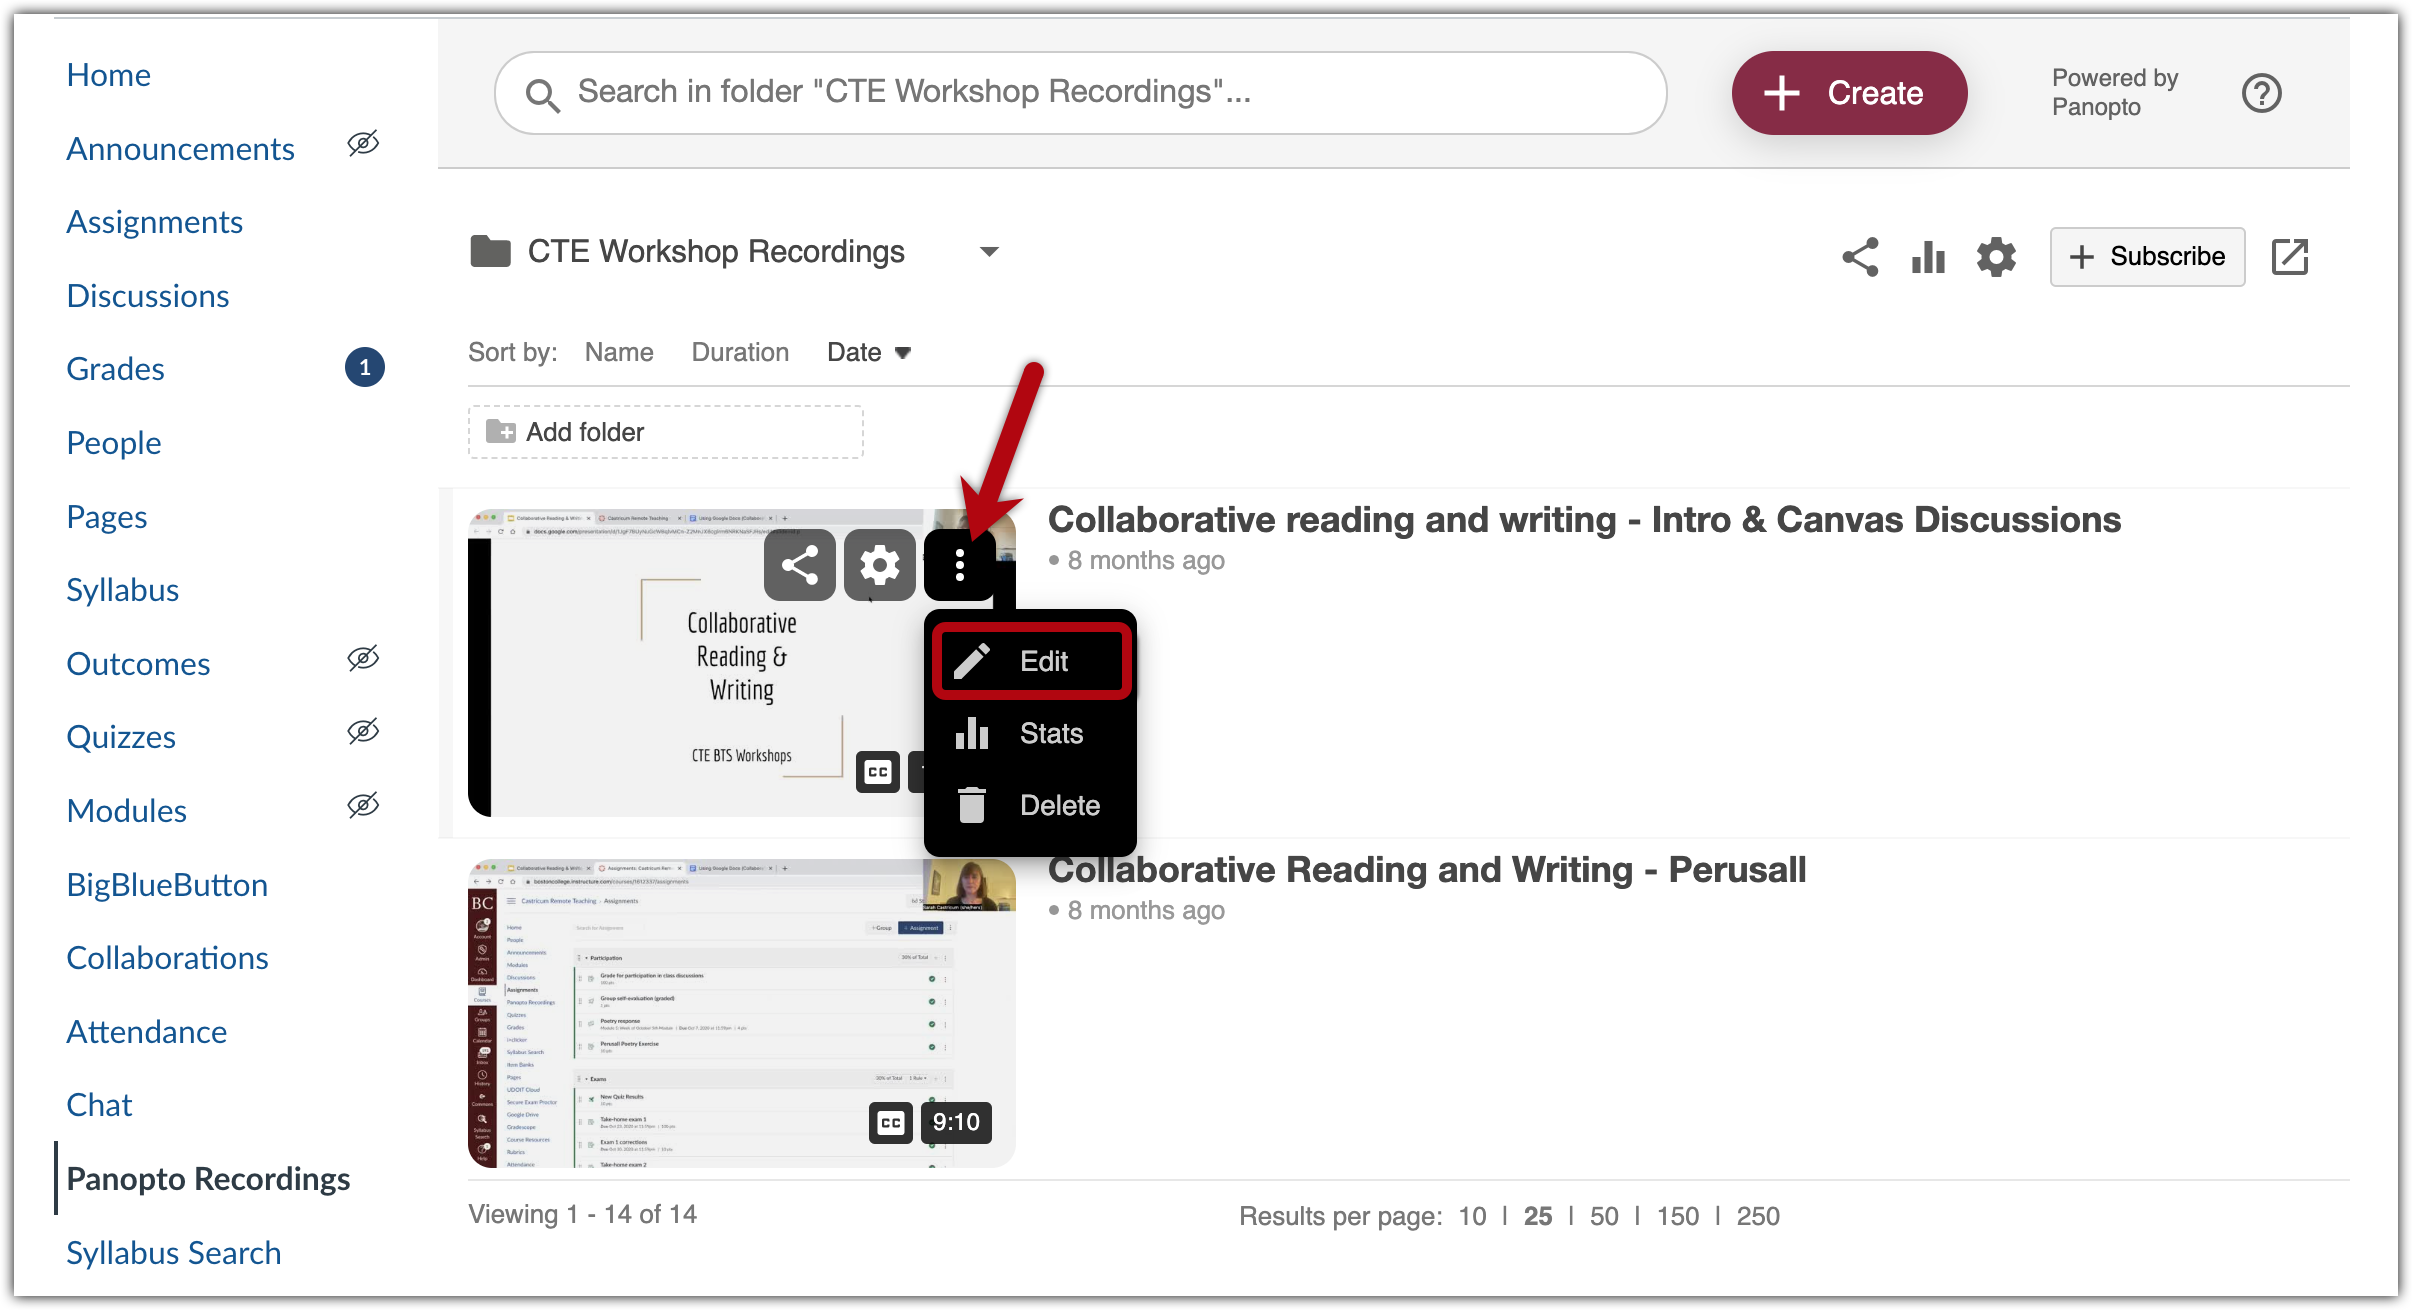
Making Edits to a Recording

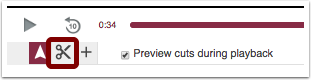
  1. Begin by clicking the scissor icon.     
                                                                  
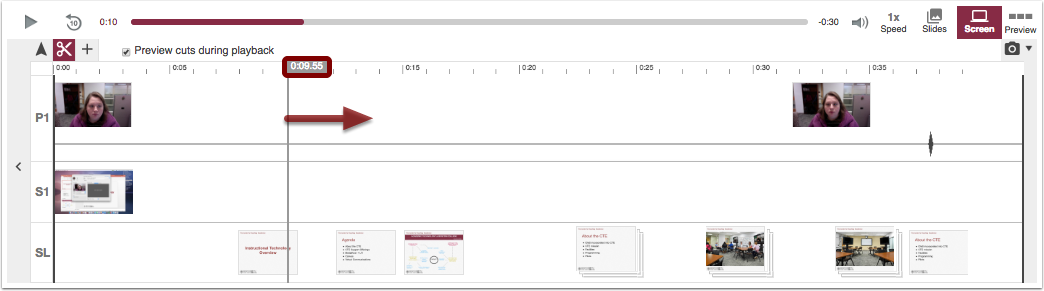
  2. To trim the recording, click on the time in the video where the cut will begin. A vertical cursor line will appear. 
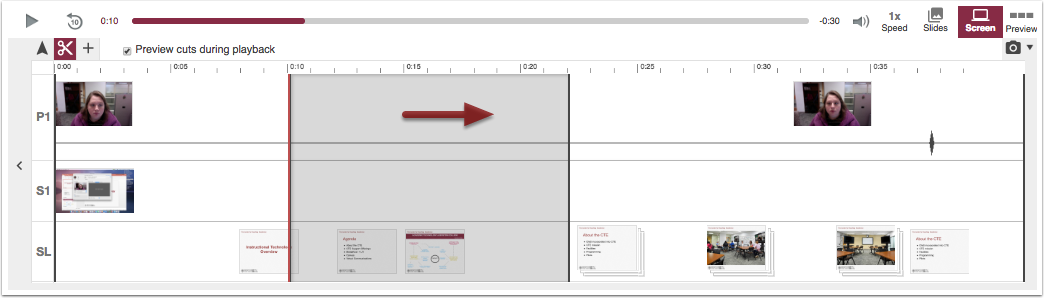
  3. Drag the cursor line to the right and let go when you have reached the place you want to end the cut.  The section of the video that was cut out will be grayed over and will not appear in the video when it is published. 
  4. This process can be repeated multiple times within a video and also at the beginning and end of the videos.

Saving Edits and Publishing to Canvas

All edits made in the editor are “non-destructive,” meaning that you are always able to restore the recording to its last published version. To do this, click “Revert.”

To update the recording with your edits, click “Apply.” Depending on your video settings, this may mean that the video will be visible to students.

Find more information about Panopto’s editor:

  • Navigate Panopto’s Video editor
  • Change preview image
  • Manually inserting and editing captions or accessing non-ADA compliant automatic captions
  • Add or edit slides
  • Add or edit streams
Previous
Student Guide to Panopto Video Assignments
Next
Add a Quiz to a Panopto Recording
CTE Logo

Contact Us | CTE Home | Log In